

Steps to connect PaidMemberShipPro and Discord Server:
Install the plugin:
- Install the plugin from PMPRO Add-ons page or through the WordPress plugins repository.
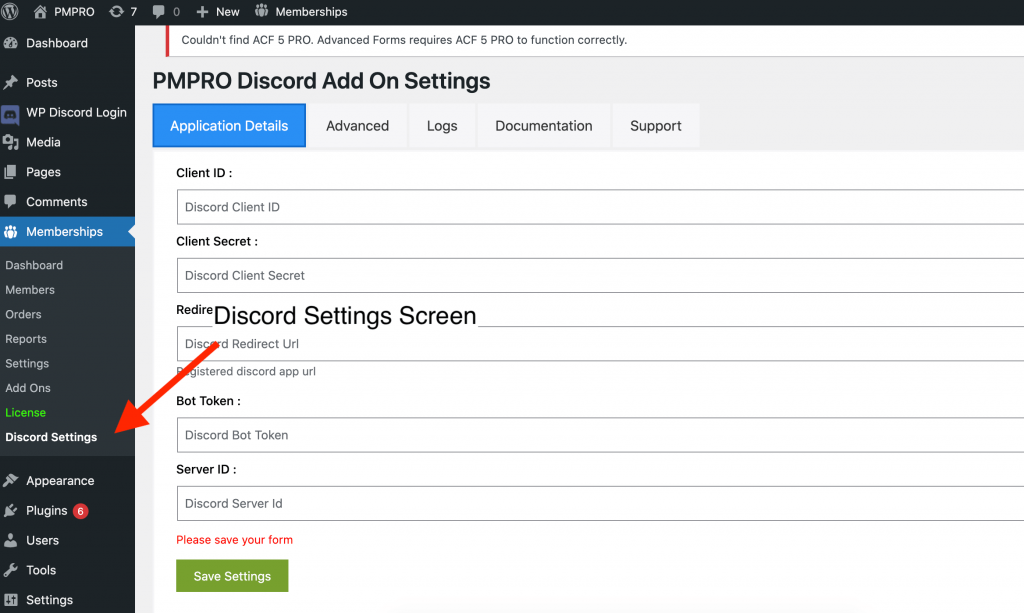
- After installing the plugin, activate and navigate to Membership -> Discord Settings.
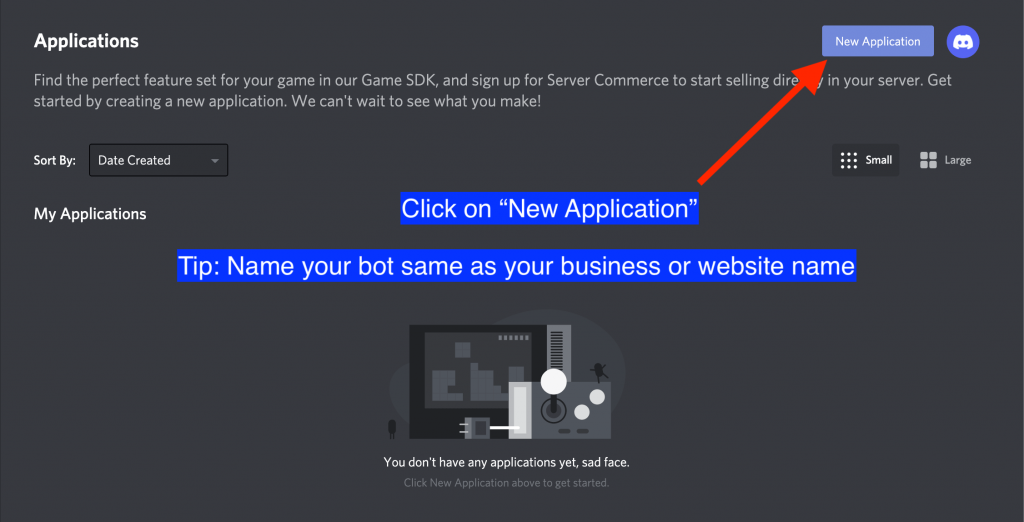
Create a new application inside disocrd.com
Login to discord.com and open this link https://discord.com/developers/applications
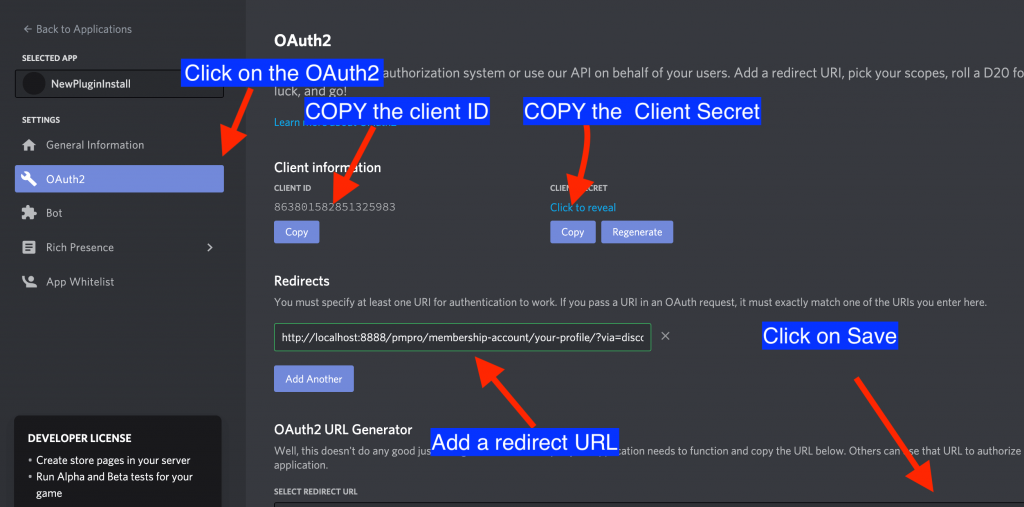
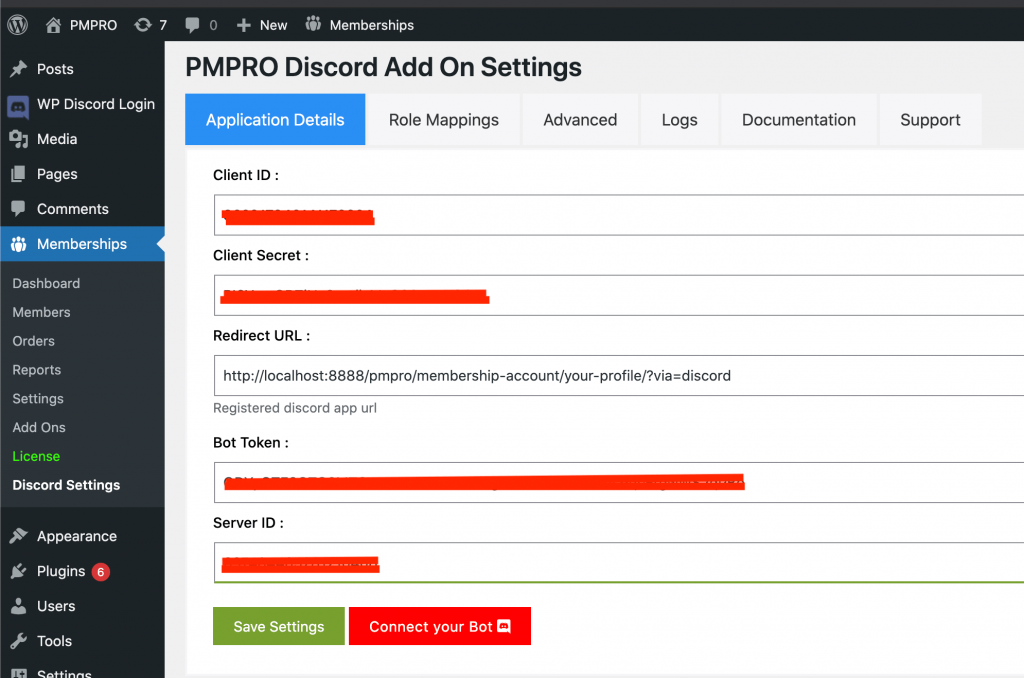
Copy the Application details
- See “OAuth2” page link in the left hand side of the screen.
- From OAuth2 screen copy the Client ID and Client Secret.
- Enter redirect URL which is already displaying inside plugin settings.
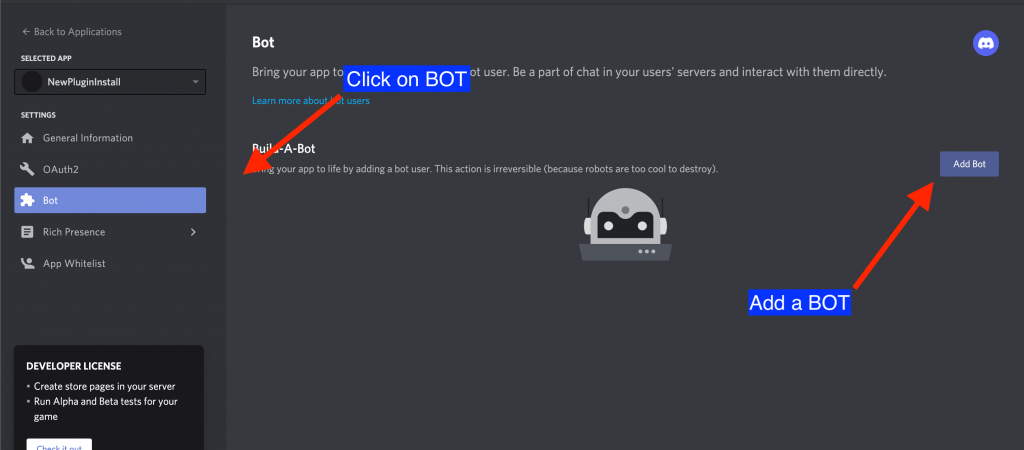
Create Bot and Copy Bot Token
- In the left hand side screen see the “Bot” page link.
- Click the “Add Bot” button this will generate the bot token.
- Make sure “PUBLIC BOT” in unchecked. if yo do not want your bot to be publicly available.
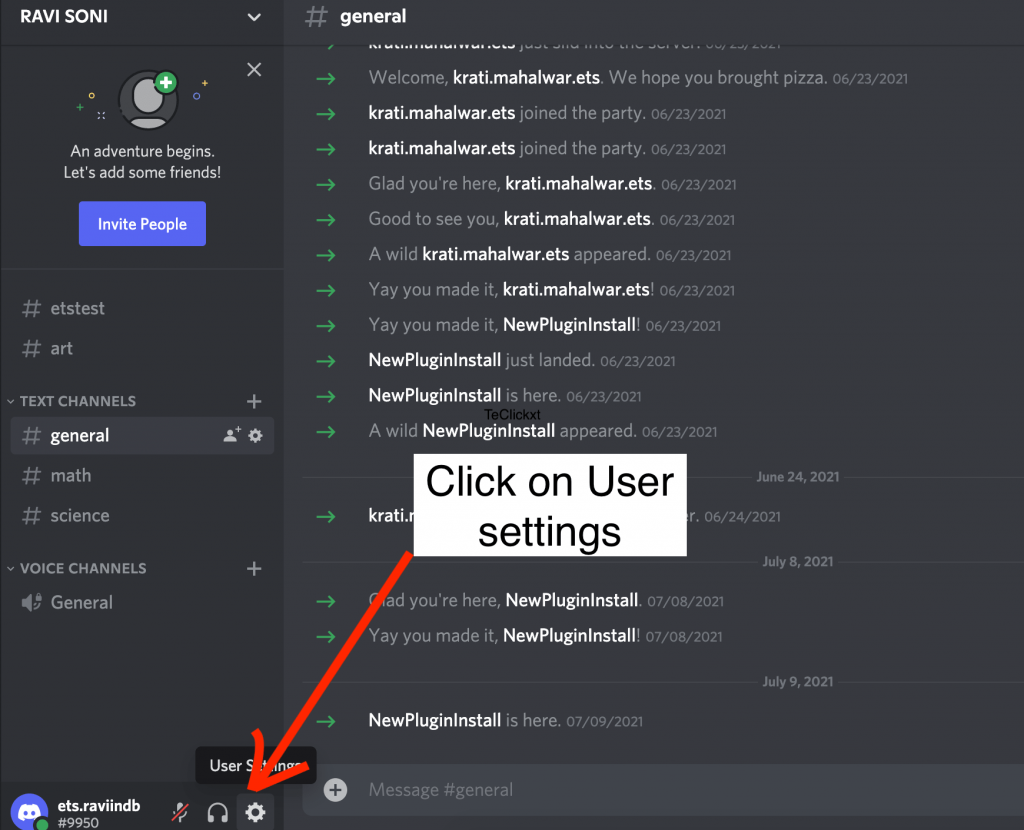
Enable Developer mode to get the Server ID
- Open discord.com
- Click on the “User Settings” gear in the bottom left of the screen.
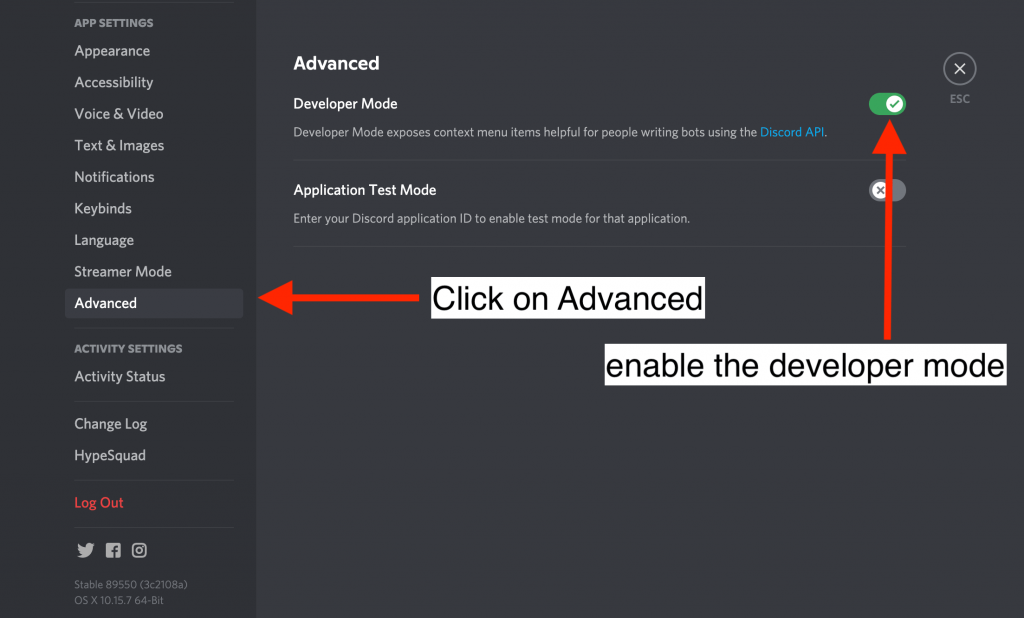
- Now find “Advanced” settings and click,
- You need To enable the “Developer Mode” and exit the screen
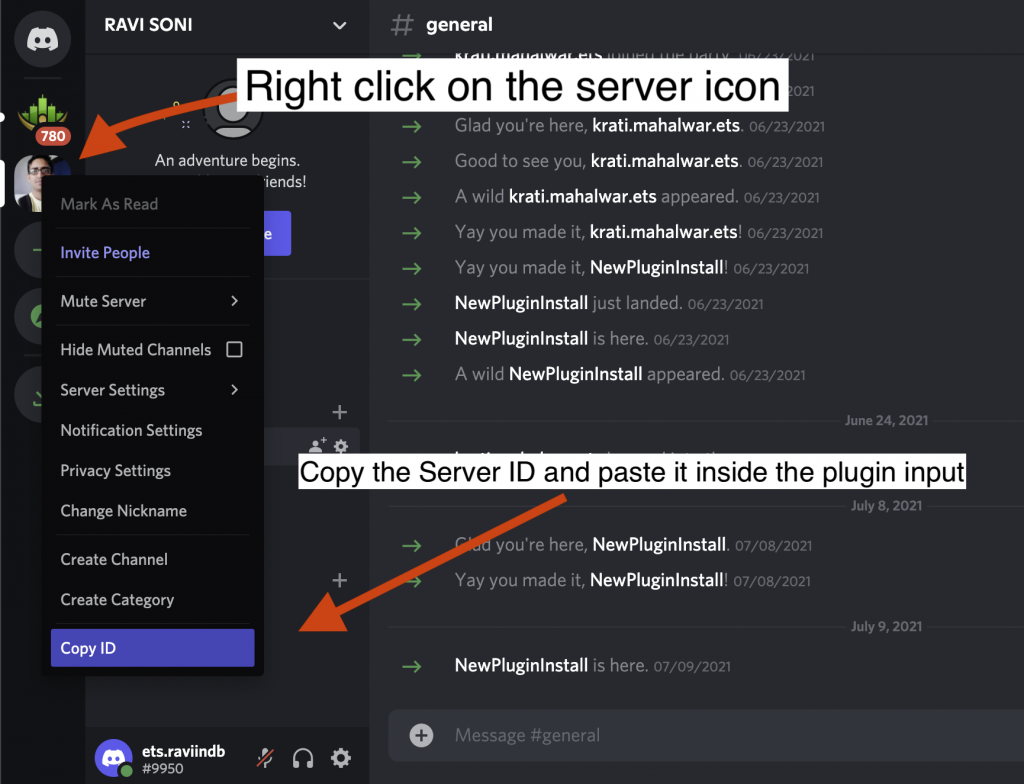
- Now click on the server icon in the left hand side of discord.com screen and do CopyID
Connect your BOT to the server
- Once all the details are correctly filled and saved inside Plugin application detail screen.
- A red button name “Connect Your Bot” will appear.
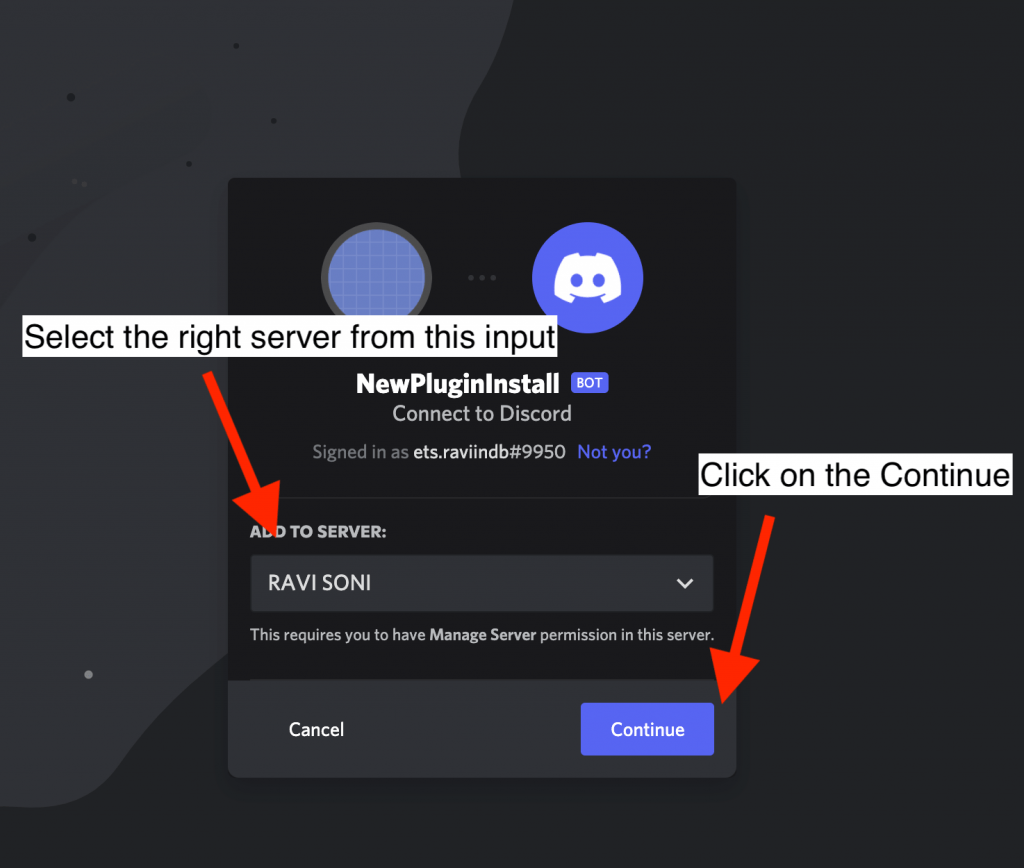
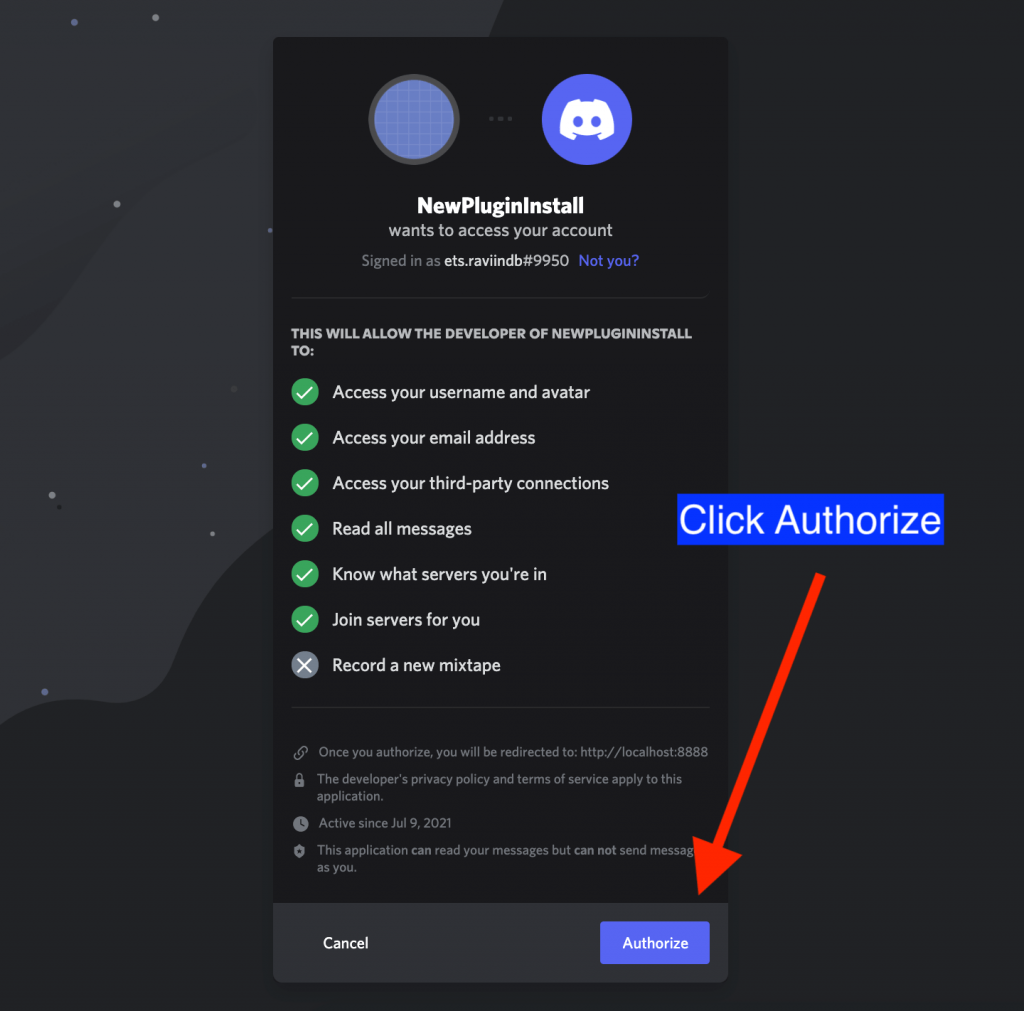
- Clicking on it will take to the discord.com, where you need to select “Server” of that Server ID you did copy in the previous step.
- You need to authorise the bot the then return again to the plugin settings screen.
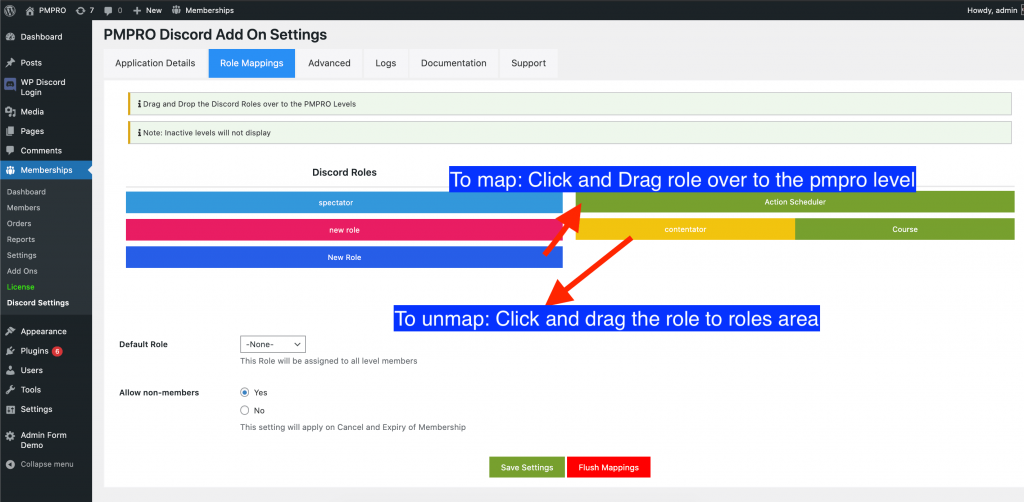
Once your BOT is connected to your server, your plugin will start listing all roles on the “Role Mappings” tab.
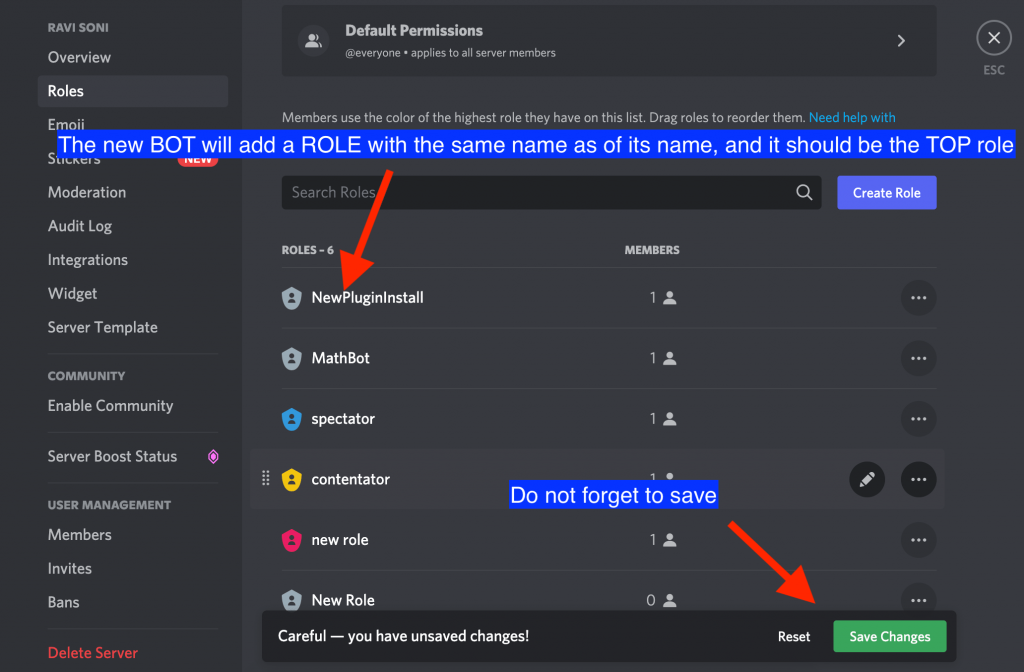
Solution of Missing Access Error
- Inside the log tab you will see “50001:Missing Access”, which is happening because the new BOT role need to the TOP priority among the other roles.
- The new created BOT will add a ROLE with the same name as it is given to the BOT itself.
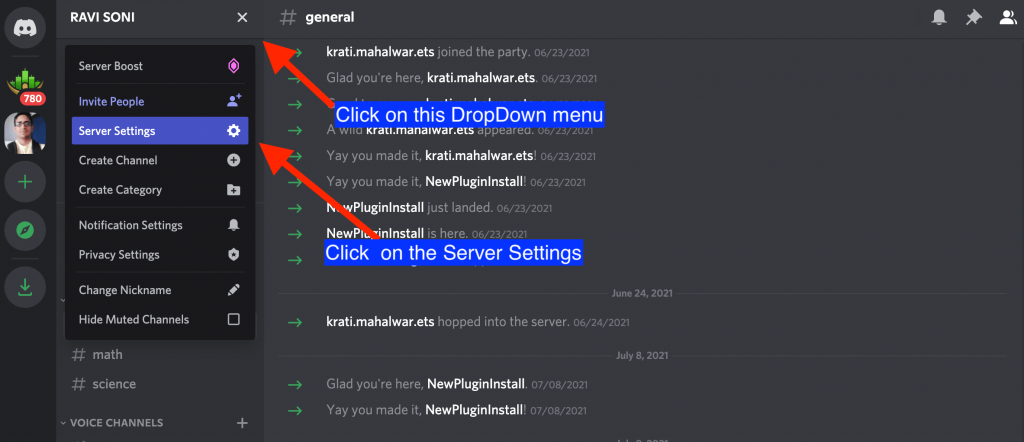
- So, Go inside the “Server Settings” from the TOP left menu.
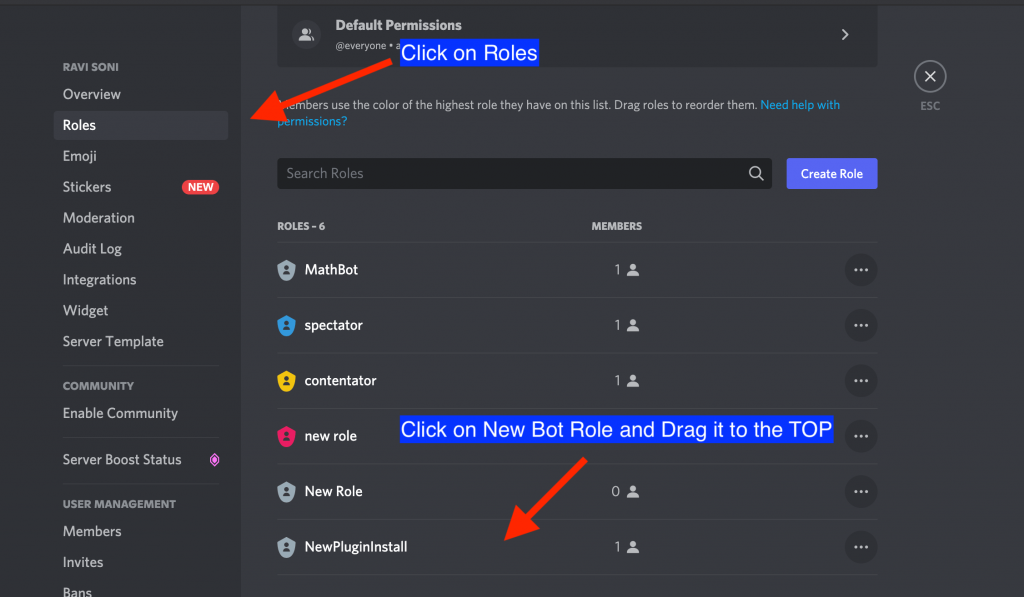
- Go inside the “Roles” and Drag and Drop the new BOT over to the TOP all other roles.
- Do not for forget to save the roles settings
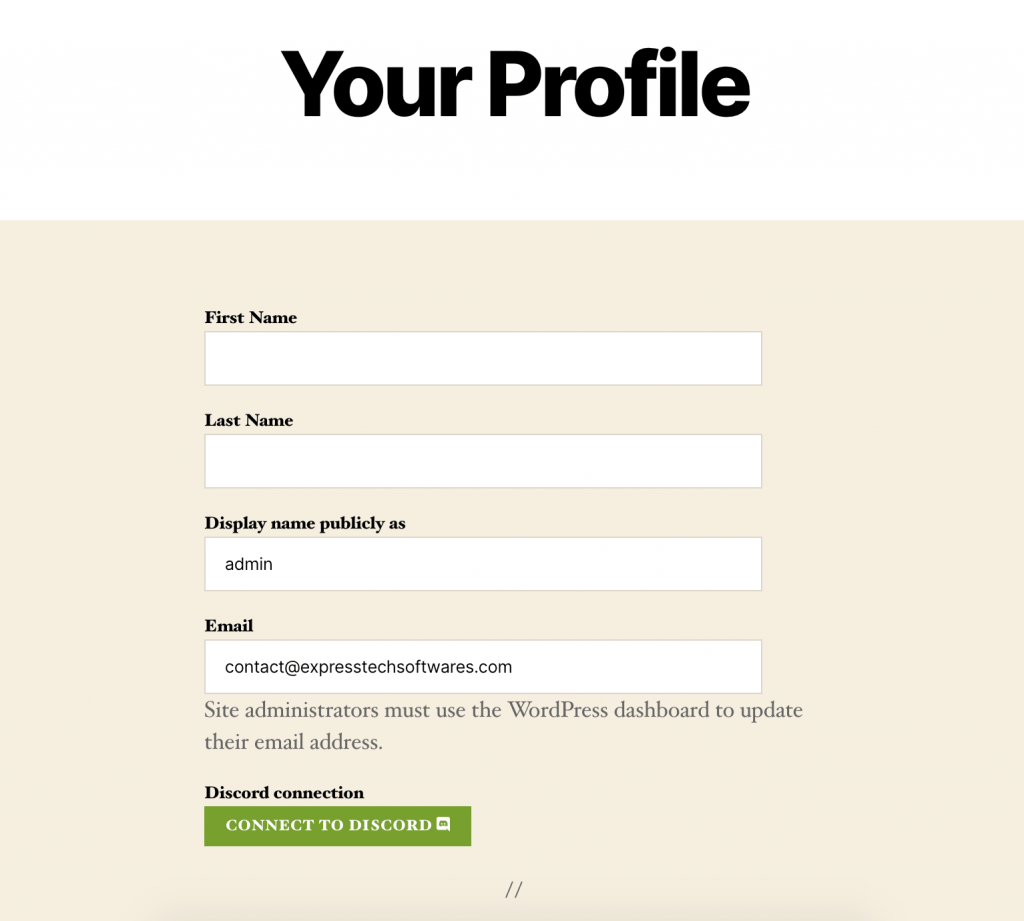
How members will connect their account to their discord?
- Members are able to “Connect To Discord” from their profile page.
- Clicking on the button will take the Member to Authorize screen.
YouTube Video of how to setup PMPRO-Discord AddOn
YouTube video of how to set PMPRO-Discord addon